How to configure the print server (computer) (Windows 2000/XP/Server 2003)
23-Apr-2012
8201525800
Solution
NOTE
The screen shots used in this section are from Windows XP Professional.
Preparing the printer sharing settings:
1. From the [Start] menu, select [Control Panel], and then click [Network and Internet Connections] -> [Network Connections].
For Windows 2000: From the [Start] menu, select [Settings] -> [Network and Dial-up Connections].
For Windows Server 2003: From the [Start] menu, select [Control Panel] -> [Network Connections] -> [Local Area Connection], and then proceed to Step 3.
2. Right-click the [Local Area Connection] icon, then select [Properties] from the pop-up menu.
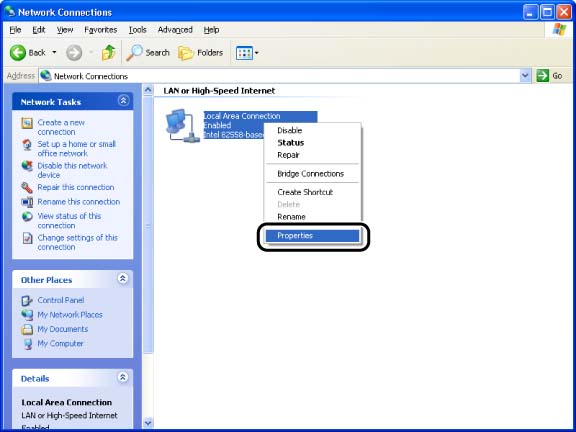
3. Make sure that [File and Printers Sharing for Microsoft Networks] is selected, then click [OK].

Printer sharing settings:
NOTE
For Windows XP, the printer cannot be shared on a network at the default settings (the settings immediately after the installation).
Printer sharing settings require running [Network Setup Wizard] to enable the sharing settings.
For more details, see Windows online Help.
1. Display the [Printers and Faxes] folder or the [Printers] folder.
For Windows XP Professional/Server 2003: From the [Start] menu, select [Printers and Faxes].
For Windows XP Home Edition: From the [Start] menu, select [Control Panel], and then click [Printers and Other Hardware] -> [Printers and Faxes].
For Windows 2000: From the [Start] menu, select [Settings] -> [Printers].
2. Right-click the icon for this printer, then select [Sharing] from the pop-up menu.
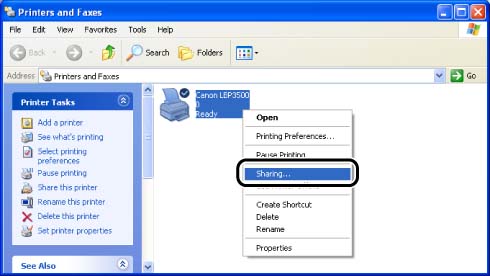
3. Select [Share this printer]. Change the share name as needed.
For Windows 2000: Select [Shared as].

NOTE
a. You can also specify the sharing settings during the local installation.
b. Do not enter blank or special characters for the share name.
4. If any client is using Windows 98/Me, click [Additional Drivers].
If no client is using Windows 98/Me, click [OK]. The printer icon changes to the shared printer icon, and the printer sharing settings are completed.

5. Select the [Windows 95, 98 and Me] check box, then click [OK].
For Windows 2000: Select the [Windows 95 or 98] check box, then click [OK].
For Windows Server 2003: Select the [Windows 95, Windows 98, and Windows Millennium Edition] check box, then click [OK].

6. Insert the "LBP3500 User Software" CD-ROM supplied with the printer into the CD-ROM drive.
If the [Insert Disk] dialog box appears, click [OK].
7. Click [Browse]. When your CD-ROM drive is drive [D:], select [D:\English\Win98_Me], and then click [OK].
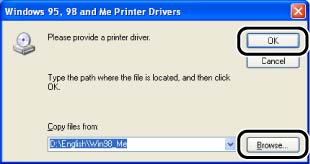
Copying files is started.
8. Click [Close].
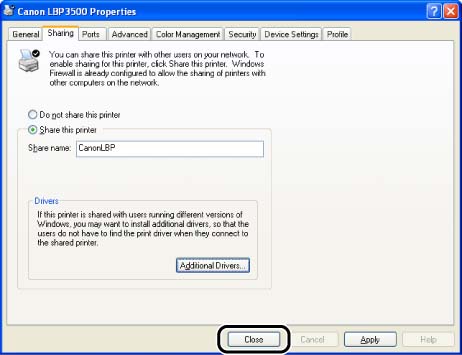
The printer icon changes to the shared printer icon.

IMPORTANT
To clear the printer sharing settings, select [Do not share this printer] ([Not shared] for Windows 2000) in the [Sharing] sheet. If you cleared the printer sharing settings with Windows XP Service Pack 2 or another operating system equipped with Windows Firewall, you need to delete the settings registered in Windows Firewall using the utility software. For details on the procedure for deleting the settings registered in Windows Firewall, see "How to configure Windows Firewall to block communication with the client computers" in Related Information at the end of this page.
Configuring Windows Firewall:
If you are using Windows XP Service Pack 2 or another operating system equipped with Windows Firewall as the print server, you need to configure Windows Firewall to allow communication with the client computers.
Use the following procedure to ensure that Windows Firewall does not block this communication.
If you installed the CAPT software from CD-ROM Setup, a [Warning] dialog box was displayed.

If you clicked [Yes], Windows Firewall was configured to allow communication with the client computers.
If you clicked [No], however, Windows Firewall was configured to block communication with the client computers, and you will need to use the following method to clear that block.
1. From the [Start] menu, select [Control Panel], and then click [Network and Internet Connections] -> [Windows Firewall].
2. In the [Exceptions] sheet in the [Windows Firewall] dialog box, select the [Canon LBP3500 RPC Server Process] check box, and then click [OK].

If you installed the CAPT software by any method other than CD-ROM Setup, you need to configure Windows Firewall to unblock communication with the client computers using the utility software. For details on the procedure for configuring Windows Firewall to unblock communication with the client computers, see "How to configure Windows Firewall to unblock communication with the client computers" in Related Information at the end of this page.