If You Want to Connect the Printer and Computer with a LAN Cable (Only for the Network Model)
27-Sep-2011
8200419800
Solution
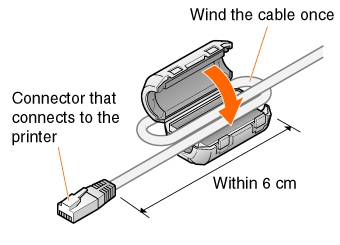
1. Attach the ferrite core to the LAN cable as shown in the figure.
Attach the ferrite core at 6 cm or less from the end of the connector connected to the printer.
NOTE
About a ferrite core
- A ferrite core is supplied with the printer.
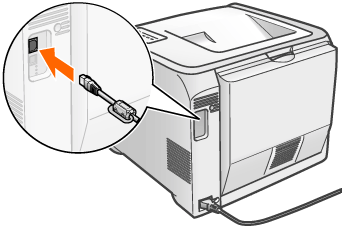
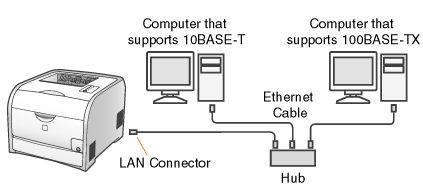
2. Connect the LAN cable to the LAN connector of this printer.
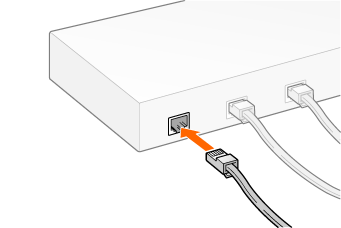
3. Connect the other end of the LAN cable to the hub.
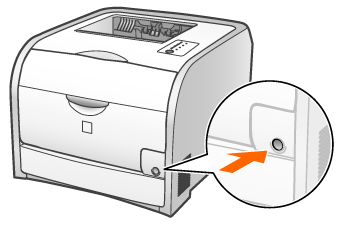
4. Press the power switch to turn the printer on.
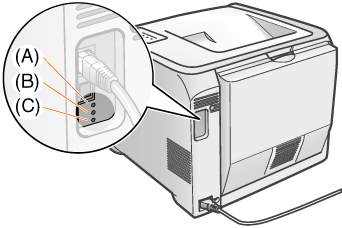
5. Make sure that the LNK indicator (B) on the printer's network board is on.
- If the printer is connected by 10BASE-T
If the LNK indicator (B) is on, the printer is connected properly.
- If the printer is connected by 100BASE-TX
If the LNK indicator (B) and 100 indicator (A) are on, the printer is connected properly.
NOTE
When all the indicators are off or when the ERR indicator (C) is on or blinking
- See "User's Guide" (HTML manual) in the CD-ROM supplied with the printer.
NOTE
About the network environment
- This printer supports 10BASE-T and 100BASE-TX connections.
About the LAN cable
- This printer does not come with a LAN cable or a hub. Have cables or a hub ready as needed. Use a Category 5 twisted pair cable for the LAN.
- If you want to connect the printer to a 100BASE-TX Ethernet network, all the devices to be connected to the LAN (hub, LAN cable, and network board for computer) must support 100BASE-TX. Contact your local authorized Canon dealer for more details.